Showing posts with label diy. Show all posts

Sunday, November 4, 2012

Knit Hood

This is my own pattern. I took my idea from this pattern. But since I don't have circular knitting needles I created my own patter. (http://www.craftsy.com/pattern/knitting/outerwear/through-the-woods-hooded-neckwarmer/4282)


If you need clarification on the pattern please comment.

MATERIALS:

  • Yarn
  • Knitting needle 10mm
  • Sewing Machine (or you can hand sew with the yarn)

KEY:

  • cnf- cable needle hold in front
  • cnb- cable needle hold in back
  • lf- left needle
  • *___* -repeat what is inside till end of row

What you will be making is a big rectangle. How long it is is up to you (How many you cast on and how many times you repeat the steps.)

Cast on a multiple of 14 plus 8. See Pattern.
This first part is for  where the buttons will be placed. You can repeat these steps until you are satisfied.
  1. Row 1(RS): k
This part is for the cabled look of the pattern. Repeat as much as you'd like for the length of the hood (how far back it goes).
  1. Row 1(RS): k4, *p4, k6, p4, *k4.
  2. Row 2: p4, *k4, p6, k4, *p4.
  3. Row 3: k4, *p4, k6, p4, *k4.
  4. Row 4: p4, *k4, p6, k4, *p4.
  5. Row 5: k4, *p4, slip 3 sts to cnf, k3 from ln, slip sts from cn onto ln then k3, p4, *k4
  6. Row 6: p4, *k4, p6, k4, *p4
  7. Repeat steps 1-6 until you reach desired length.
When finished fold the work in half so that the right sides are facing each other. Sew one side of the work together to make a hood.

Saturday, October 20, 2012

diy Henna Tattoo

I've heard a whole lot of diy Henna tattoos and so I decided to try one out for once. This one I found online but I did my own editing to it to make it last even longer possibly. I'll have to update this one later on to say how long it really did last on me.

Materials:

  • Waterproof Mascara or Eye Liner or Lip Stain Pencil
  • Waterproof Liquid Bandage Spray
STEP ONE:

Draw your design on your skin after making sure it is clean.

STEP TWO:

Follow the directions on how to put on the liquid bandage.

And you're done :)

Sunday, October 7, 2012

Knit Hood Scarf with Pockets

This pattern is my own, it's a simple cabled pattern. If you need clarification on the pattern please comment.

MATERIALS:

  • Yarn
  • Knitting needle 10mm
  • Sewing Machine (or you can hand sew with the yarn)

KEY:

  • cnf- cable needle hold in front
  • cnb- cable needle hold in back
  • lf- left needle


  1. Row 1(RS): k4, p4, k6, p4, k4.
  2. Row 2: p4, k4, p6, k4, p4.
  3. Row 3: k4, p4, k6, p4, k4.
  4. Row 4: p4, k4, p6, k4, p4.
  5. Row 5: k4, p4, slip 3 sts to cnf, k3 from ln, slip sts from cn onto ln then k3, p4, k4
  6. Row 6: p4, k4, p6, k4, p4
  7. Repeat steps 1-6 until you reach desired length.
  8. When finished fold the work in half so that the right sides are facing each other. Sew one side of the work together to make a hood.
  9. If you would like to make pockets for your hands at the ends of the scarf use a the same type of method. Fold the ends so that the right sides are facing each other and sew the sides together to make pockets.

Monday, October 1, 2012

Pumpkin Decorating

It's my favorite time of year. Fall. Halloween. My birthday. All these things are amazing. And I got to decorate my first pumpkin yesterday. I don't have a picture of the finished project but here are some steps to it. I hope this inspires someone =D

Oh and by the way the watercolors that I tried to use didn't really work out. And I didn't get to use the white paint cause it was all chunky.


Sunday, September 30, 2012

Casting on a Loom

The other day Evan gave me a loom for knitting and I'm watching lots of videos learning a lot of techniques to knitting. So today's video is simply casting on with a loom.

YouTube:

Saturday, September 29, 2012

diy Camera Strap

I have two camera straps that are both not the softest things in the world and since I'm close to going to Universal Studios I decided it was time to make a better one. I played with lots of ideas. Making a small pillow and attaching it. Making one from scratch with cushion. But my friend, Maddie, had the best idea by far. Turn a tie into a camera strap and in the process destroy one of my other ones. So here is how I did it.

Materials:

  • Tie
  • Old camera strap
  • Sewing Machine


STEP ONE:

Cut out the pieces of the old strap (the two hooks and the belt loop)


STEP TWO:

First put the small end of the tie into one of the hooks and sew it together.

I wrapped it around twice so that it wouldn't wiggle around and it ended up looking really cute and like it was a tied tie.

And how I sewed it together.


STEP THREE:

Now place the big part of the tie through the belt loop and through the other hook.


STEP FOUR:

Now with the big pointy end of the tie push it through the center ring of the belt loop so it looks like this. And sew it.


STEP FIVE:

Go take lots of pictures comfortably!!

Design Capelet with Hood

So I'm pretty excited. I made this a couple days ago and it has turned out so well. I love it and am so excited to start wearing it as it gets colder and wetter. =D


Thursday, September 27, 2012

Fudge

This is a fast and easy recipe. (http://ideasmag.co.za/food-entertaining/step-by-step-fudge/)

Sorry for not having pictures. Right now my computer is wigging out about not having space so I need to get a flash drive just for my pictures.

Ingredients:

  • (125 ml or 8.5 tbs) Butter
  • (15 ml or 1 tbs)Syrup
  • (30 ml or 2 tbs)Milk
  • (15 ml or 1 tbs)Water
  • Saucepan
  • (1 can)Condensed Milk
  • (750 ml or 3 cups)Sugar
  • (5 ml or 1 tsp)Vanilla Essence
  • Pinch of Cream of Tartar
STEP ONE:

Melt the butter, syrup, milk and water together in a heavy based saucepan. Remove the saucepan from the heat and add the sugar. Return to the heat and bring to boil. Boil for five minutes while constantly stirring.

STEP TWO:

Remove from the heat and leave the mixture to cool for a couple minutes (it should be a light caramel color). Pour the condensed milk into the mixture in a steady stream while stirring.

STEP THREE:

Return to heat and cook over a low heat for 15 minutes. Stir continuously to prevent the mixture catching fire.

STEP FOUR:

The mixture is ready when it is very firm. Stir the vanilla and cream of tartar into the mixture. Now pour the fudge into a greased pan (7X7 in) and leave till it sets. Cut into squares. Leave to set before removing. Store in and airtight container.

Sunday, September 23, 2012

Knit Casting On

Here is a link to the YouTube video on how to cast on. Sorry for poor video. My computer needs more space so I need to buy a flash drive just for pictures and such.


Thursday, September 20, 2012

Frozen Yogurt Blueberries

Ready to get messy? Well you can either get messy or spend a lot of time with toothpicks.

Ingredients:

  • (thawed) Frozen Blueberries
  • Yogurt (of your choice)
  • Cookie Sheet
  • Wax Paper
STEP ONE:

Thaw blueberries and place out. Put some yogurt in a bowl. Get out cookie sheet and cover with wax paper.

STEP TWO:

There are two options for this:

  1. Roll the blueberry around in the bowl till well covered and place on cookie sheet till full or desired amount.
  2. Take a toothpick and stab the blueberry. Roll it around bowl till well covered and place on cookie sheet till full or desired amount.
STEP THREE:

Place in freezer for two hours. Enjoy!

Next Week:
Fudge

Tuesday, September 18, 2012

diy Peppermint Mocha Creamer

9-18

Today I decided to make my own Peppermint Mocha Creamer since I went through my store bought bottle very very quickly. I haven't quite perfected it yet but I think I am close and when I'm done I will put actual measurements for you. Here is what I did today.

Ingredients:
  • Half and Half
  • Milk (I used Skim)
  • Sugar
  • Chocolate Syrup
  • Peppermint Extract
  • Dropper


STEP ONE:

Poor the Half and Half into the container like below.


STEP TWO:

Add chocolate syrup. And a drop of peppermint extract.


STEP THREE:

Mix together.


Pour into glass. It wasn't as good as I wanted so I added two drops peppermint. Add a spoonfull of sugar. And a splash of milk and it was better. I'll work on a final recipe in a couple days once I run out of this mixture.

9-19

IT HAS BEEN COMPLETED!!!

I finally figured out how to make it (it probably is easier just to go buy it but I wanted to make it and it's really good).

Ingredients:

  • (1/2 cup) Half and Half
  • (1 cup) Milk (I used Skim)
  • (1 tbs) Sugar
  • (3 tbs) Cocoa Powder
  • (40 drops) Peppermint Extract


STEP ONE:

Pour in the milk and half and half.


STEP TWO:

Add cocoa, sugar and peppermint.

STEP THREE:

Mix together.

STEP FOUR:

Enjoy!


Saturday, September 15, 2012

Knit Ghost Toy

This is a day early cause I already put the video up on YouTube and am making a Knit bracelet for tomorrows blog.

Today I'm going to give you the necessary stitches to make a knit ghost toy. The stitches are knit, purl, knit front and back, and knit two together along with the abbreviation for st-st. The pattern is free and you don't have to sign up for anything. Here is the link to the pattern and the movie I put together is below to show you how to do these stitches. (I had to go through youtube cause it was having problems putting it here).
Pattern:
http://www.allfreeknitting.com/Halloween-Knits/spooky-knit-ghost-toy/ml/1

YouTube:

YouTube for icord:

Tie Bottom T-shirt redo

Here is a tutorial of how to make a tied bottom t-shirt. I got this idea from (http://thecraftcaboodle.blogspot.ca/2012/07/tie-bottom-top-from-old-t-shirt.html) and I added my own flare to it.

Materials:

  • T-shirt (can be bigger than you or fitted)
  • Scissors
STEP ONE:

Lay your t-shirt out nice and flat. Cut off the sleeves and the collar.


STEP TWO:

Find how long you want the shirt to be and cut a straight line in the back and two inches into the front then cut a huge triangle to the bottom and cut down the center of the triangle.


 Tie the bottom and you get this.

Now to add my own flare I decided to cut slits into the side to make it bigger and more flowy and just to make it look cool.

STEP THREE:

Lay the edge of the shirt nice and flat.


Cut slits about a finger wide. Then stretch them out nice and tight.

Then you end up with something like this.


Enjoy =D

Sunday, September 9, 2012

diy Checkered Nails

How to make checkered pattern nails. It is really easy.

Materials:
  • Tape
  • Scissors
  • Two colors of nail polish
  • Clear coat (optional)
STEP ONE:

Paint your nails a solid color. Then take a small piece of tape and cut it in half. Place tape on your nail so that the tape covers the green area (see picture below).

 STEP TWO:

Take the second color of nail polish and paint nail over nail polish that isn't covered with tape. Then peal off tape before nail polish dries but do it slowly so as to not mess up the polish.

And there you have it checkered nails. If you want you can cover it in a clear coat to make it last longer. I didn't cause I'm under the belief that I do too much with my hands so clear coats never work. If you have a really good brand to suggest to me please comment below =D have a nice day.

Saturday, September 8, 2012

diy Wrap Skirt

Today I am making my sixth Wrap Skirt which can also become a dress and a wrap. It is very simple and can be done by beginning seamstresses.

Materials:

  • (2) 2.5 yd of fabric (Polyesters are always good but really any fabric that isn't very stiff will work)
  • Serger (or Sewing Machine)
  • Scissors
  • Measuring Tape
  • Chalk

Note: If you do not have a serger then where I say serge simply fold fabric inward just a fourth of an inch or so and sew hem instead.

STEP ONE:

Lay our your fabric for the shorter layer and from one edge measure in 37 inches. Make a mark with your chalk (this is the center point). From the center point measure out 37 inches in a circle till it makes half a circle. Then from the center point measure 12 inches and make another half circle. It should look something like this.


STEP TWO:

Next lay out the fabric for the longer layer of the skirt and once again measure out 37 inches and make center point. From the center point measure out 37 inches for where the green line is (see picture below). But for the rest of the purple line measure out 47 inches. And again from the center point measure twelve inches to make the red circle.


STEP THREE:

Now serge the green and purple lines (see picture above) for both layers. Then put them together like they will be when the skirt is finished. Like this.


Mine is all bunched up but it's supposed to be longer than the black on all sides. Now where the red line is serge those two together.

STEP FOUR:

Now cut a 2.5 yd x 3 in strip from one of the fabrics and line it up with the red line (this will be the tie so make sure it is hanging a bit out on either side) and serge it together.

Now you are done and your skirt should look something like this. It can be worn as a dress or a wrap just play around with it. Enjoy.


Wednesday, September 5, 2012

diy Fabric Chandelier


I know this is a fabric chandelier but you can also do it with fringe and it is super cute but since I was on a budget I just used some leftover fabric that I had at home already.

Supplies you will need:
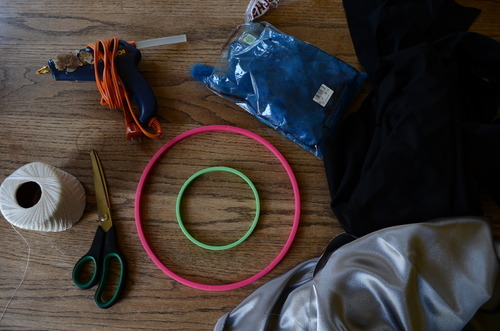
  • 2 embroidery hoops of different sizes. I used an 10'' and 5'' got them at Hobby Lobby and it was just a few bucks for both of them
  • Hot glue
  • Fabric/Fringe 
  • Some string to tie the hoops together preferably in the same color scheme as your fabric or fringe
  • Feathers/Paint/Lace (optional)
  • Scissors
  • Some paper plates
  • A jar or something


If you don't want the wood or colorful part to show on your chandelier I suggest painting it or put lace over it or do like I will do later and put some cheap feathers over it. But also the fabric hides it pretty well on its own.

STEP ONE:
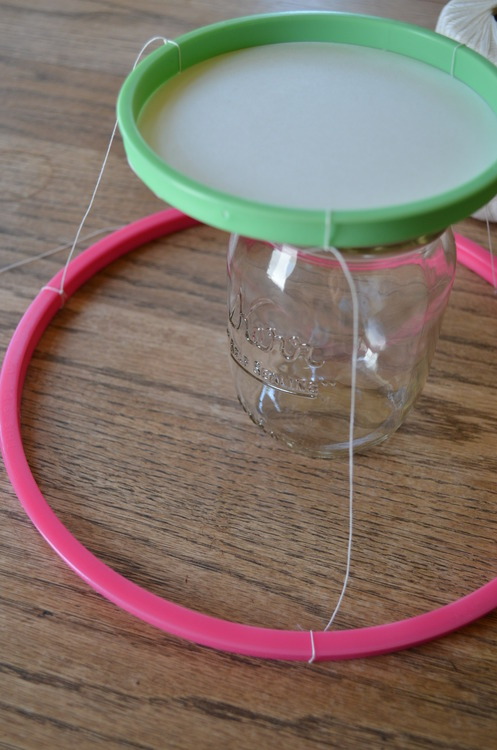
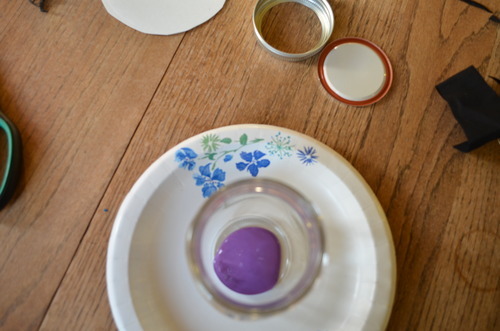
Get your jar and place the smaller ring on top of it. If it doesn't fit then cut a paper plate to about the same size as the small ring. After that tie your string from one hoop to the other making them as close to the same size as possible when tied and everything. You'll end up with something like this:


STEP TWO:
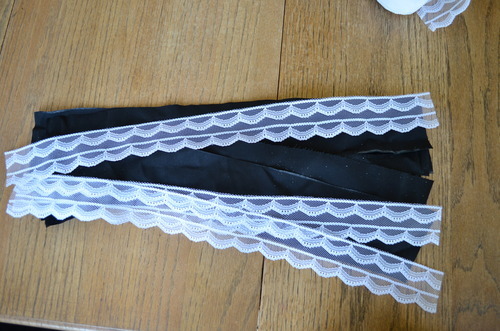
Cut out your fabric strips. I did mine about one inch wide and 15 inches long for the first tier and then one inch wide and 20 inches long for the second tier. They don't have to be perfect. You could also use lace strands on top of your colored ones but be careful of the hot clue going through the holes.


STEP THREE:
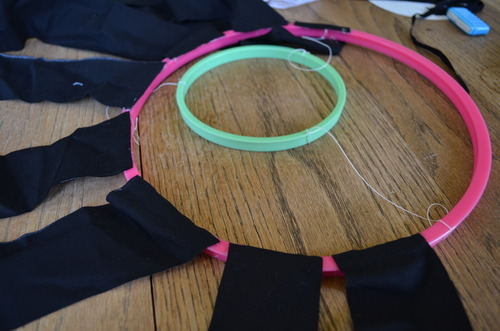
Place hot glue on top of the embroidery ring and press on the fabric strips until the glue cools down. I left gaps in mine and put the silver strands in between them.


STEP FOUR:
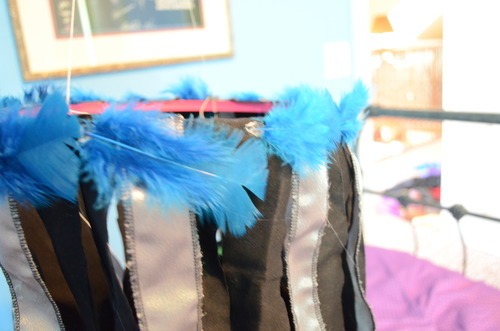
After you have all the fabric that you desire on BOTH rings then you can decorate with the feathers or lace if you choose otherwise skip this step. I just put a drop of hot glue and pressed the feathers down on it until it cooled and went all away around the hoop like this.


STEP FIVE:
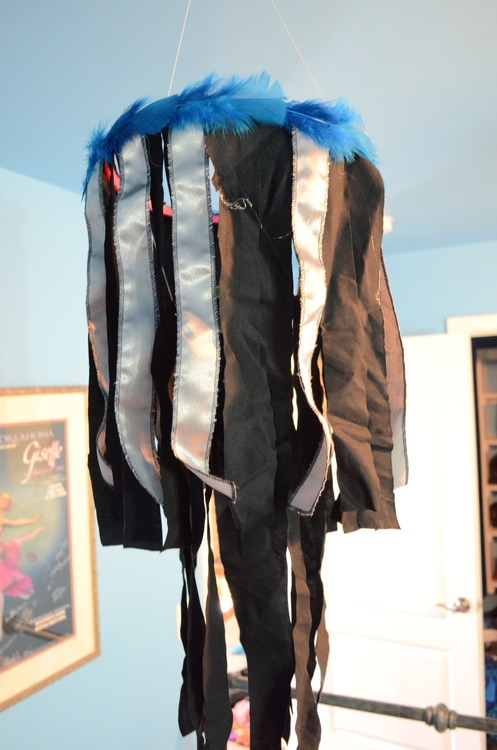
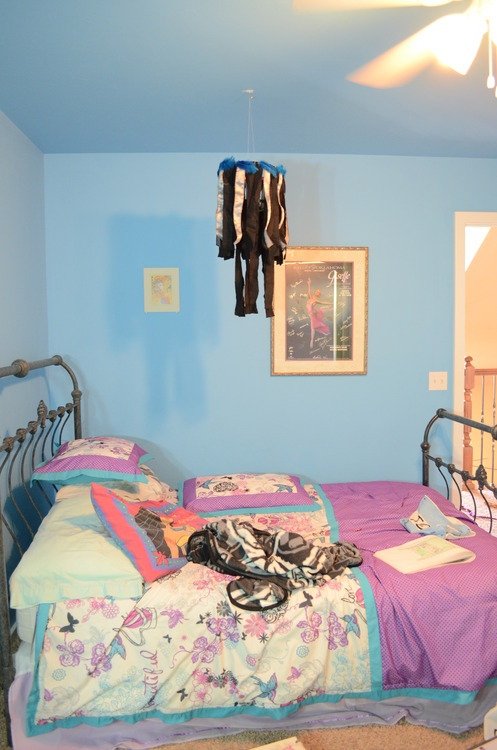
Now find a place in between the fabric to tie a string onto the top (bigger) ring and tie another knot on the other side this will make a place to hang the chandelier and now you are done. Here is my finished product.


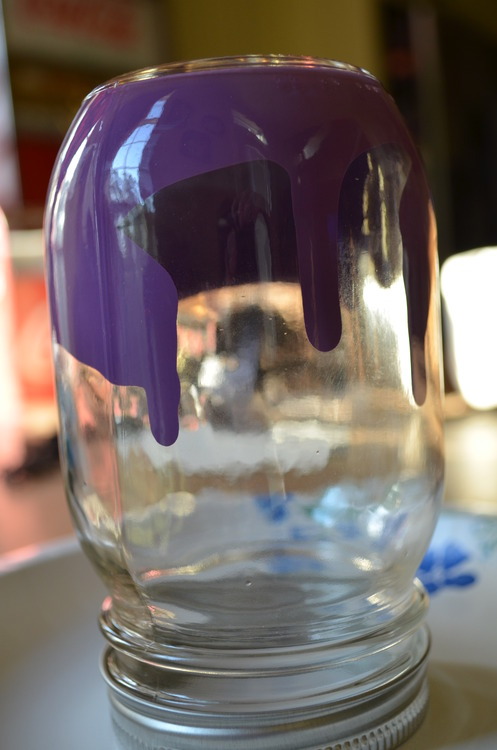
diy Painted Mason Jars


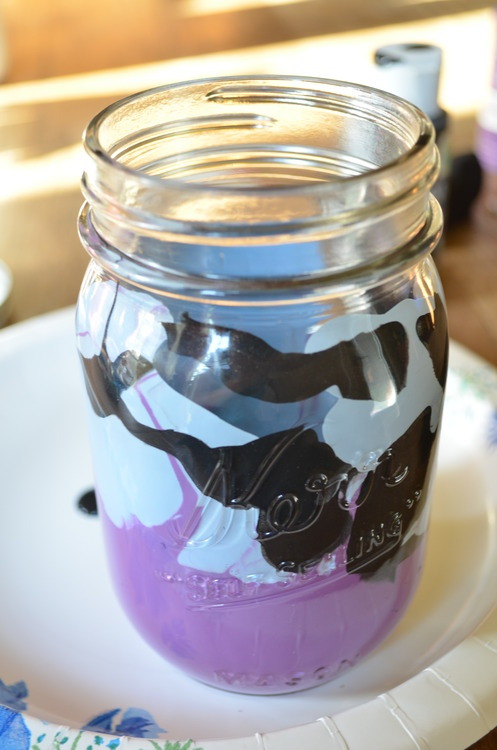
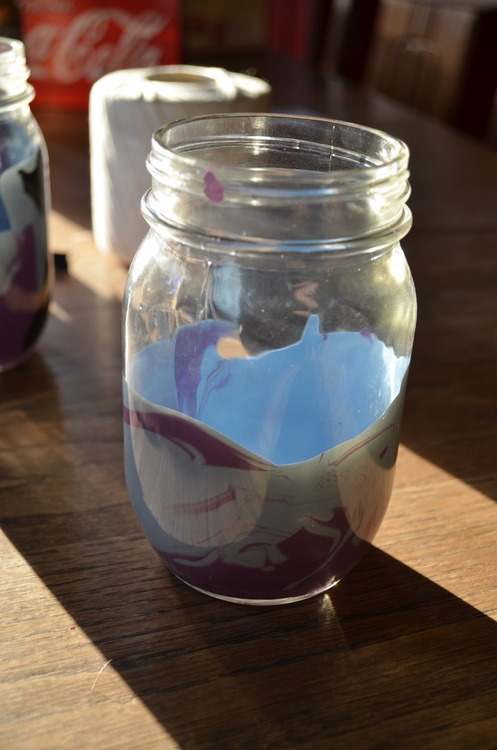
Awhile back I got some mason jars and was really excited to do stuff with them and so I did my first thing that came to mind. I painted the inside of them. And it was super easy. Here is how I did it but obviously there are many other ways to design. This is just for general idea.

Supplies:
  • Mason Jar
  • Paint
  • Paper Plate
STEP ONE:
First place a generous amount of paint on the inside of jar.


STEP TWO:
Swirl the jar around till you run out of paint to swirl or like how it turned out.


STEP THREE:
Repeat Step One with different color until you are done. This is how mine turned out.


What I use these for are to hold my pens and pencils on my desk. They turned out really well and in the month or so that I've had them they haven't chipped even with the constant use (one thing I was worried about).

Thanks for reading. If you have questions please feel free to ask.